Have you ever uploaded an image on WordPress, added it in multiple places, but ended up needing to replace it? Finding all the places where the image was used in could be a difficult and time-consuming manual process, especially if you need to do that multiple times in a row. That’s why we have found the best and easiest way how to replace an image in WordPress. This method works for other media files too.
While WordPress hasn’t implemented this functionality, you will need to use a plugin called Enable Media Replace (by ShortPixel). Currently, it is the most popular plugin in its field with around 600 thousand active installations.
Follow the steps below to replace an image in WordPress:
1. Download the plugin
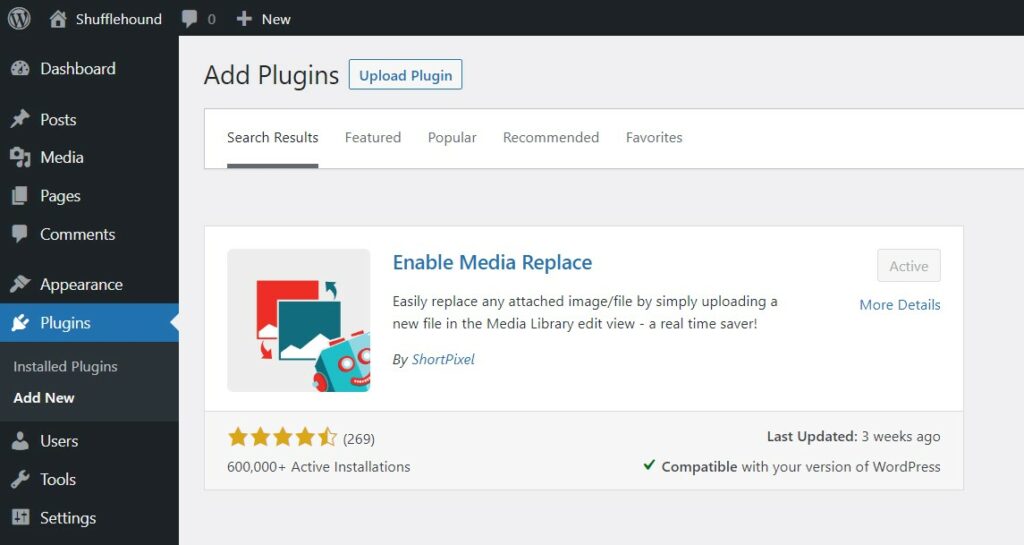
The best way to install and active the plugin is via the plugin library:
- Open the dashboard of your WordPress website
- Click on Plugins (on the left side)
- Click on Add New (at the top of the content)
- Type “Enable Media Replace” in the Search plugins… field and press Enter
- Click Install Now for the plugin you searched
- When the installation is done click Activate to finish the installation
Alternatively, you can also do this manually via a ZIP file:
- Download the Enable Media Replace ZIP file from here by clicking on the Download button
- Open the dashboard of your WordPress website
- Click on Plugins (on the left side)
- Click on Add New (at the top of the content)
- Click on the Upload plugin button next to the Add plugins title
- Locate and choose the downloaded ZIP file
- Click Install Now
- Click on Activate Plugin button to finish the installation
2. Navigate to WordPress Media
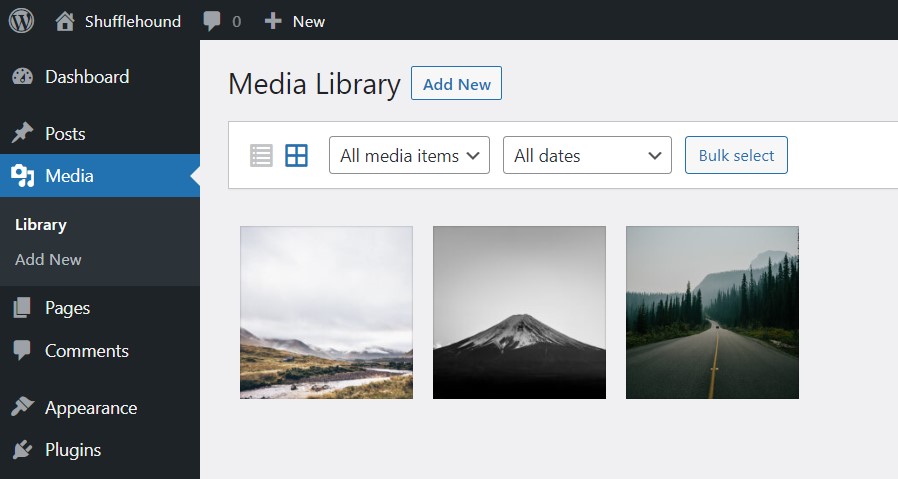
Navigate to the Media page (on the left side of the menu).
3. Select the image
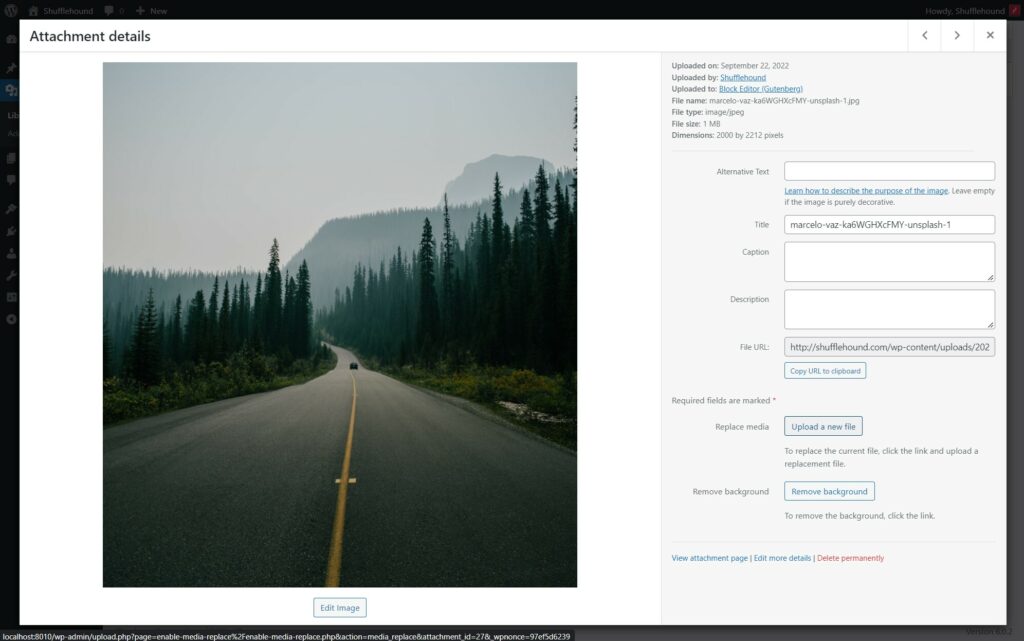
Depending on your media page view (it is either a grid or a list) the steps differ:
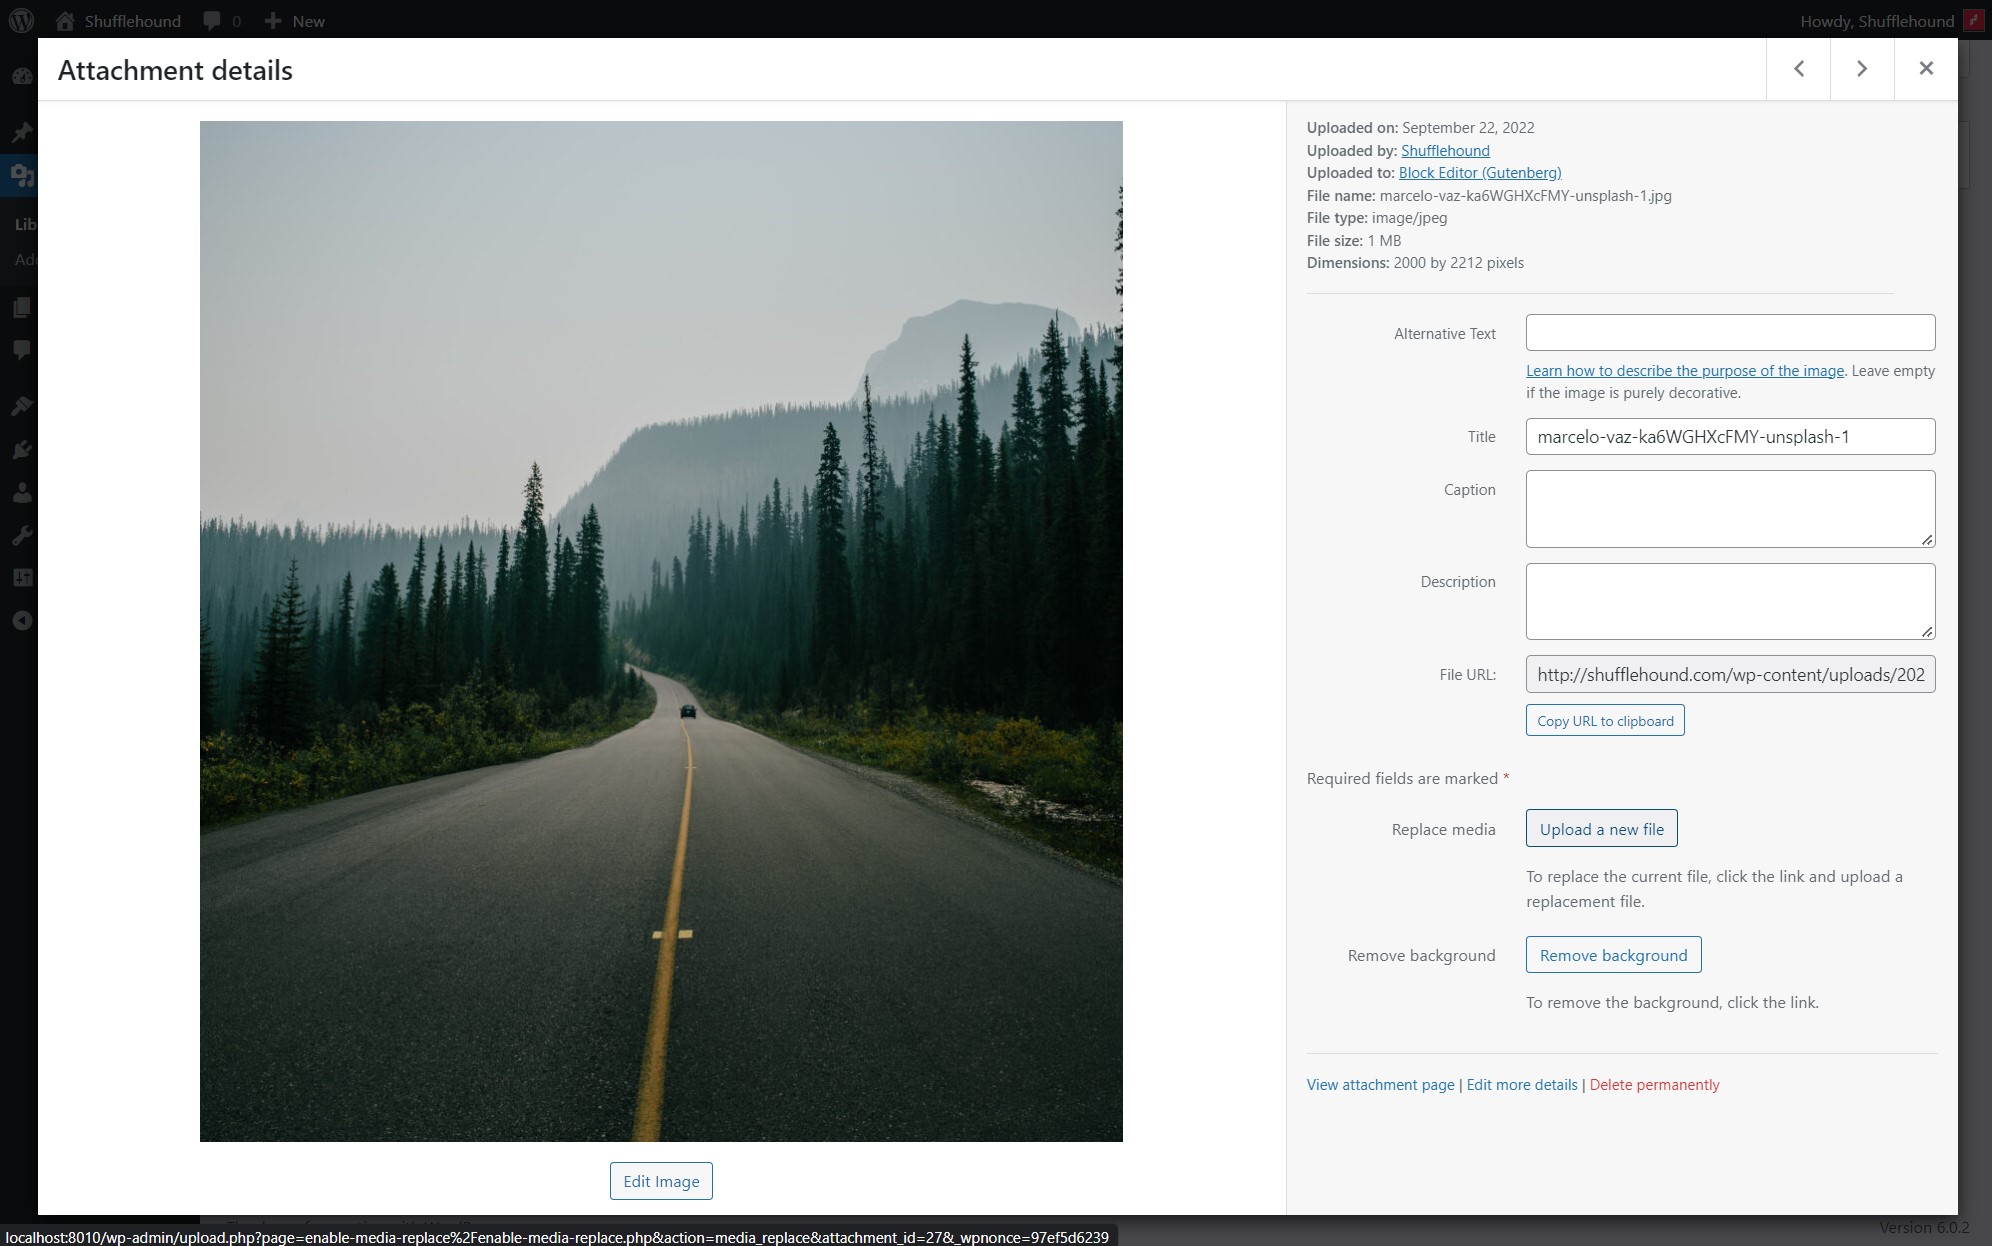
- For the grid view (with images only) – open the image or media file you would like to replace and then click on the Upload a new file button next to the Replace media text
- For the list view (with images, names, and actions) – hover over the image or media file row you would like to replace and click on Replace Media action
4. Replace the media
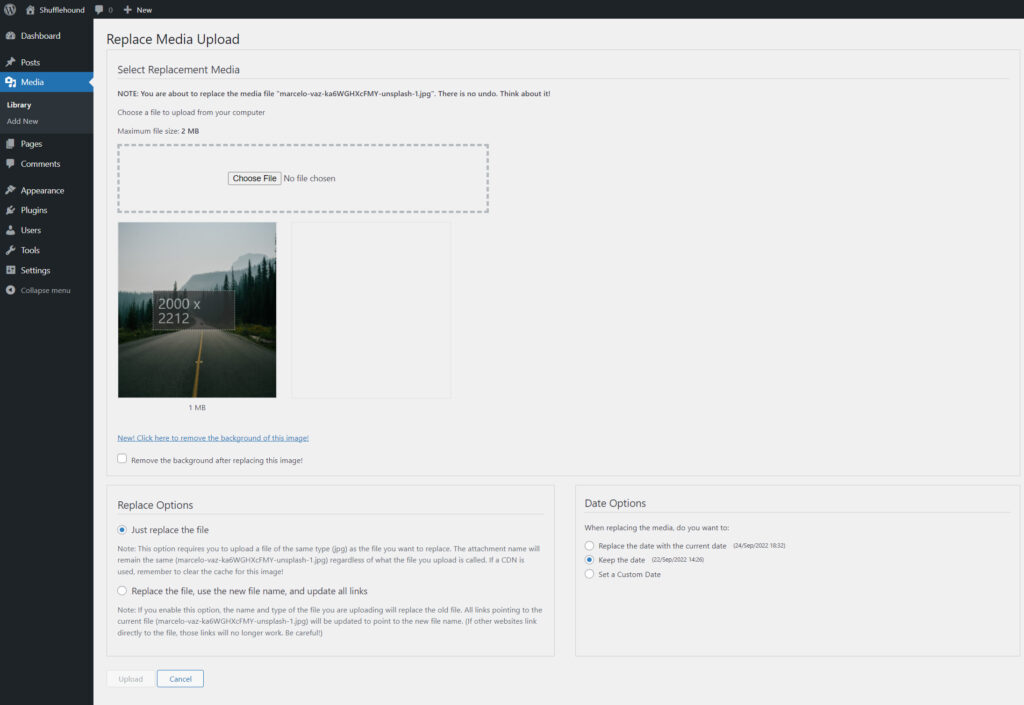
Drag and drop the new file inside the dotted block (or click on Choose File to browse and find your file) and click Upload (at the bottom of the page). The page will redirect you to the new file’s page. You should see a File successfully replaced notice.
There are several options for this action regarding how the replacement should work and how the new date should look. Here is an explanation of what each of them does.
Replace Options
Using Just replace the file (our recommended option) will keep your old image links intact. This means that any website links to your photo will keep working.
There are some precautions you need to take when choosing this option:
The new file format needs to match the old one. That means if your old photo was a JPG, the new one has to be a JPG too.
You may need to clear the cache for your browser and CDN (if you use it). Otherwise, when viewing the photo – you will see the old image.
The technique for clearing the cache for your CDN depends on the CDN you are using. Visit the FAQ page of your CDN to find the proper technique. Meanwhile, for the browser – it should be in the settings. Alternatively, you can press CTRL + F5 while viewing a page with your photo if it is not updating to the new one.
Using Replace the file, using the new file name, and updating all links allows you to upload any file format you want, but it could create broken file links of your photo for some page builders as well as break external links to the file.
Date Options
Each media has a property of the upload date. By default, the date is not that important as most likely it is not visible anywhere on your website. But there could be plugins that use the date in another functionality.
Using Keep the date (recommended) will keep the old file’s date.
Using Replace the date with the current date will overwrite the date with the current date.
And when using Set a custom date will allow you to pick a date and even set hours and minutes for it.
Bonus: replace an image in WordPress without a plugin
You can (but should you?) also replace images manually.
All the images you have uploaded are kept in your WordPress installation folder under wp-content/wp-uploads/(year)/(month). You could technically replace them, but it would be a time-consuming process since WordPress generates as many as 10-20 image sizes for different use cases. Replacing each of them manually would take far too much time.
If you still need to replace your images manually we can suggest replacing the main image (the one without image dimensions in the file name). After doing so – you need to regenerate all the small images by using the Regenerate Thumbnails plugin.
Conclusion
Replacing an image in WordPress shouldn’t be a challenging thing to do – and it isn’t if you have learned our technique. This is one of the techniques that improve our team’s workflow on a daily basis – just like another one we shared on our how to duplicate a page post.
